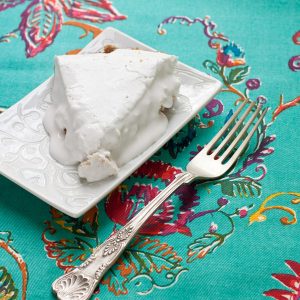
Coconut cream pie
Ingredients
Crust
- 2 ounces dates fresh, Medjool, 1/4 cup, about 4 dates
- 8 ounces pecans (2 cups)
- 1/2 tsp vanilla extract
- 1/4 tsp sea salt
Filling
- 14 ounces coconut milk canned, not light, preferably organic
- 2 ounces dates fresh, Medjool, 1/4 cup, about 4 dates
- 1 tbsp vanilla extract
- 1-1/4 tsp gelatin grass-fed
- 1/2 cup coconut (flakes, unsweetened) finely shredded
- 1/4 cup coconut (flakes, unsweetened) large flakes, if available
Whipped cream topping
- 14 ounces coconut milk canned, not light, preferably Thai Kitchen
- 3 packets stevia (organic) preferably NatVia
- 1 tsp vanilla extract
- 1/4 tsp cream of tartar optional, but recommended
Instructions
Crust
- In a food processor fitted with the S-blade attachment, process the crust ingredients until finely ground. The crust should stick together when pressed between two fingers.
- Grease a pie pan or other dish with coconut oil.
- Press the crust evenly into the pie pan across the bottom and up the sides.
Filling
- Open the coconut milk and scrape out the hard layer at the top into the blender.
- Pour the liquid into a small saucepan and sprinkle the gelatin over. Place over low heat, whisking until the gelatin is dissolved.
- Blend the ingredients from the coconut milk can, the saucepan, the dates, and the vanilla until very smooth.
- Stir or whisk in the finely shredded coconut.
- Pour into the crust and refrigerate until set, at least 4 hours.
Whipped cream topping
- Refrigerate the can overnight.
- Open the coconut milk and scrape out the hard layer at the top into a mixer bowl.
- Begin whipping, increasing the speed gradually to high. It takes about two minutes to get to the soft peak stage.
- Sprinkle in the cream of tartar (if using), stevia, and vanilla. Continue whipping until it's light and fluffy. If yours doesn't look like whipped cream, it's okay. Just pour it on top of the filling and refrigerate until set. It will still taste great.
- Spread the coconut whipped cream over the pie filling and return to the refrigerator to set, about 4 hours. Sprinkle with large flakes of toasted coconut before serving.